
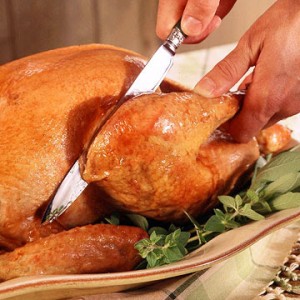
Carving Safety Tips for this Holiday Season

Carving article photoThanksgiving is just around the corner and almost everyone is planning a big feast, strategizing for the family football rematch, watching the Macy’s Day parade and of course, NFL football on TV.

With all these things going on in one day, there is no bigger star than the Thanksgiving turkey as it is paraded from the kitchen into the dining room where someone will be carving the revered bird. This holiday season, Orthopedic Specialists would like to caution all the carvers out there as they carve the main course and not their hands.

People sustain hand injuries during Thanksgiving and the entire holiday season. When friends and family are watching you as you carve the turkey, you may feel a little overwhelmed, so focus; don’t let your turkey day celebrations go fowl this year because of a hand injury.

Safety Tips for Thanksgiving Feast

Follow these easy tips and get your bird on the table in time so guests can start gobbling:

  1. Never cut towards yourself. One slip of the knife can cause a horrific injury. While carving a turkey or cutting a pumpkin your free hand should be placed opposite the side you are carving towards. Don’t place your hand underneath the blade to catch the slice of meat.
  2. Keep your cutting area well-lit and dry. Good lighting will help prevent an accidental cut of the finger and making sure your cutting surface is dry will prevent ingredients from slipping while chopping.
  3. Keep your knife handles dry. A wet handle can prove slippery and cause your hand to slip down onto the blade resulting in a nasty cut.
  4. Keep all cutting utensils sharp. A sharp knife will never need to be forced to cut, chop, carve or slice. A knife too dull to cut properly is still sharp enough to cause an injury.
  5. Use an electric knife to ease the carving of the turkey or ham.
  6. Use kitchen sheers to tackle the job of cutting bones and joints.
  7. Leave meat and pumpkin carving to the adults. Children have not yet developed the dexterity skills necessary to safely handle sharp utensils.
  8. Lastly, should you cut your finger or hand, bleeding from minor cuts will often stop on their own by applying direct pressure to the wound with a clean cloth.

Visit an emergency room or a hand surgeon if:

  1. Continuous pressure does not stop the bleeding after 15 minutes
  2. You notice persistent numbness or tingling in the fingertip
  3. You are unsure of your tetanus immunization status
  4. You are unable to thoroughly cleanse the wound by rinsing with a mild soap and plenty of clean water

Dr. Weil states, “I often see patients whose holiday season has been ruined by an accident in the kitchen. The most common kitchen injuries that I treat are lacerations. Lacerations sustained while carving pumpkins, turkeys, and other holiday fare can be quite serious. These injuries can include cut nerves, arteries and tendons. These types of injuries require immediate surgical management to restore function. Treatment can include microscope assisted nerve repairs, artery repairs, and tendon repairs. If you sustain a laceration where you lose sensation to your finger or hand or are unable to bend your finger please seek medical treatment immediately.”

These simple tips will help you enjoy that bird and the rest of your holiday season. If you would like more information on specialty care of the hand, call Orthopedic Specialists and make an appointment with one of our expert, orthopedic doctors at (206) 633-8100.
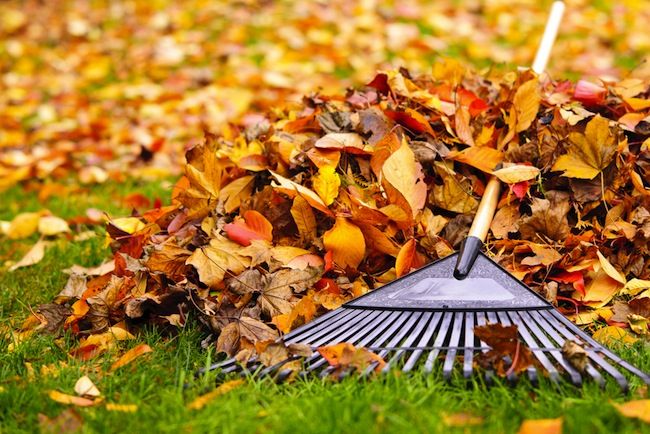
Fall Clean-Up and Rake Safety

Fall is a beautiful time of the year when the leaves turn color and in the Pacific Northwest, it is sometimes also wet because of the rain. Preparation and taking a common-sense approach to raking the beautiful leaves is important and raking requires a number of different activities, including twisting, bending, lifting, and reaching, that use several different muscle groups. Improper use of lawn tools along with the potential for tool-related accidents further compounds the risk of injury to the bones and muscles.

Fall leaves and Rake
Raking leaves is a vigorous exercise, and you need to warm up for at least 10 minutes with some stretching and light exercise. You also need to:

Do some form of light exercise (such as walking) for 10 minutes to warm up the muscles before raking or other yard clean-up

Use a rake that’s comfortable for your height and strength. Wear gloves or use rakes with padded handles to prevent blisters. If you have a rake that is too short you will have to bend over which will cause strain on your back. It is the repetitive movement in raking, not the weight that can strain the muscle.

Don’t wear hats or scarves that interfere with vision and beware of large rocks, low branches, trees stumps and uneven surfaces.

Alternate your leg and arm positions often. When you pick up piles of leaves, bend at the knees, not the waist. Use your legs to shift your weight rather than twisting your back. Do not throw leaves over your shoulder or to the side while raking as this involves twisting movements that can overly strain the muscles in your back. As a reminder from Dr. Shapiro, “Take care of your shoulders and use more bags, filled ¾ full. Lifting and throwing heavy, wet bags is a common way to hurt your shoulders and neck.”

Wet leaves can be slippery. Wear shoes or boots with slip-resistant soles.

Don’t overfill leaf bags, especially if the leaves are wet. To avoid back injury, you should be able to carry the bags comfortably.

When raking, don’t throw leaves over your shoulder or to the side, because that kind of twisting motion places too much stress on the back.

Don’t overdo it. Raking is an aerobic activity – you may need to take frequent breaks or slow your pace if you are an infrequent exerciser.

If you do experience a new strain or sprain, proper care can be easily remembered by using the acronym, RICE:

  • Rest (minimize movement of the injured body part)
  • Ice (apply a cold pack)
  • Compression (light pressure wrap to the affected body part can help minimize leakage of blood and swelling)
  • Elevation (raise the body part up so that the pressure from the blood and tissue swelling the affected area is reduced as the fluids drain from the area by gravity)

If you do experience an injury during your Fall clean-up, call Orthopedic Specialists of Seattle and make an appointment to see one of our expert doctors.

MCL Tears and Repairs By Dr. Charlie Peterson, MD

MCL Tears and Repairs

The medial collateral ligament (MCL), located on the inside portion of the knee, is one of the more common sporting injuries to the lower extremity. It is usually an “acute” injury, meaning that it happens suddenly due to trauma. In sports, the athlete may take a sudden blow to the outside of the knee, creating excessive tensile force to the MCL, such as being tackled in football. This injury also occurs commonly in sports where the ankle is immobilized such as hockey and downhill skiing, where the ankle is stabilized in a skate or boot. This immobilization leaves the knee to absorb the full impact of a collision or fall and increases the risk of knee injury.

Functional Anatomy

The skeletal anatomy of the knee consists of three bones. The thigh bone, medically termed the femur connects with the shin bone, called the tibia. In the front of the knee is the knee cap, or the patella. Holding these bones together are the four major knee ligaments. Two are located deep within the joint and are called cruciate ligaments. They prevent excessive forward and backward motion, as well as rotation. The remaining two are the collateral ligaments, and are located on the sides of the knee. Their job is to prevent lateral, or sideways, motion of the knee. The MCL is located on the inside of the knee joint and prevents the knee from collapsing inward. In addition to the bones and ligaments, the knee has two cartilage pads called the medial meniscus and lateral meniscus. These pads act as shock absorbers within the knee.

Types of MCL Injury

Tears to the MCL are usually a result of direct trauma, either from a blow to the outside of the knee, such as with a football tackle, or a fall that pushes the lower leg sideways. Partial tears will cause varying degrees of instability within the knee, and are often treated successfully with conservative interventions including bracing and physical therapy to strengthen the surrounding musculature. Complete tears may cause significant instability in the knee, especially if in combination with other ligament injuries such as the ACL.

If isolated, even high-grade MCL tears can still often be treated with bracing alone. However, such tears often occur in conjunction with other structures such as the medial meniscus or the anterior cruciate ligament (ACL). The medial meniscus has a direct connection to the MCL, making it particularly susceptible to injury during an acute MCL sprain. Should this be the case, surgical intervention may be required to restore full function due to the degree of instability caused by multiple injuries.

Non-operative Treatment

MCL tears are most often treated successfully without surgery. With significant tears there may be an initial degree if instability following injury. A hinged knee brace may be prescribed to limit control of this aberrant movement. As the ligament heals, your orthopedic surgeon may refer you to physical therapy to strengthen the leg musculature surrounding the knee, and also to restore normal movement patterns that may have been disrupted following injury and immobilization. Patients are able to perform most of their normal daily activities during this process, with the possible exception of high intensity athletics, and generally have very good outcomes following four to eight weeks of rehabilitation.

Surgical Treatment

In cases where non-operative treatment has failed or in some multiple ligament injuries, the surgeon will recommend repair or reconstruction surgery. This means that the damaged MCL will be repaired with sutures if possible. If that is not possible, then a new ligament can be fashioned from a soft-tissue “graft,” a piece of tendon taken from either the patient or a cadaver. A small incision is made to gain access to the area, and the repair made, or the tendon graft is anchored in place with surgical screws.

Following surgery, there will be a period of immobilization, followed by physical therapy. The duration and intensity of the rehabilitation process is dependent on the type of MCL repair or reconstruction, and the other injuries present. In most cases, patients can return to full function including athletics at the conclusion of treatment.

Pumpkin Carving Safety Tips

Every October, carved pumpkins peer out from porches and doorsteps in the United States and other parts of the world. Gourd-like orange fruits inscribed with ghoulish faces and illuminated by candles are a sure sign that Halloween and the holiday season is upon us. The practice of decorating “jack-o’-lanterns” – the name comes from an Irish folktale about a man named Stingy Jack – originated in Ireland, where large turnips and potatoes served as an early canvas.

Irish immigrants brought the tradition to America, home of the pumpkin, and it became an integral part of Halloween festivities. Click Here and find pumpkin carving safety tips for you and your loved ones!

Seahawks DE Michael Bennett taken off field on stretcher

On Sunday, September 29, seattlepi.com reported that Seahawks defensive end Michael Bennett, who has been a big story this season as Seattle’s sack leader, was taken off the field Sunday on a stretcher after he was injured on a play against the Texans in Houston. The article reported, “Late in the second quarter, Bennett was rushing Texans quarterback Matt Schaub when he was pushed from behind by a Houston defender into Schaub’s leg. Bennett’s head appeared to snap back, and his helmet flew off as he hit the ground. Bennett laid face-down on the turf for several minutes as trainers tended to him.”

According to the news article, “Bennett suffered a strained muscle in his back that was close to his vertebrae. The location of the injury was why medical personnel were extra-careful and carted Bennett off the field on a stretcher.” Head coach, Pete Carroll said that he was “fine” and a tweet was sent out the next day stating that Bennet was practicing and that he may be able to play in their upcoming game against Indianapolis.

Treatment of a lumbar muscle strain is important to understand. Once you know the cause of your symptoms, you can proceed with treatment. It is important that if you are not sure of the cause of low back pain, that you are evaluated by a physician. According to Dr. Charlie Peterson, “Back injuries can be painful, frustrating and even scary, but are also common. As such, the vast majority can be managed with a few simple techniques. However, if you have unusual symptoms or your pain persists, it’s time to seek advice from a specialist.”

If you are experiencing pain in your lower back or it has been injured as a result of physical activity, below is a list to help you treat your injury:

Step 1: Rest

The first step in the treatment of a lumbar muscle strain is to rest the back. This will allow the inflammation to subside and control the symptoms of muscle spasm. Bed rest should begin soon after injury, but should not continue beyond about 48 hours. While it is important to rest the injured muscles, it is just as important to not allow the muscle to become weak and stiff. Once the acute inflammation has subsided, some simple stretches and exercises should begin.

Step 2: Medications

Two groups of medications are especially helpful in treating the acute symptoms of a lumbar back strain. The first of these are anti-inflammatory medications. These medications help control the inflammation caused by the injury, and also help to reduce pain. There are many anti-inflammatory options, talk to your doctor about what medication is appropriate for you.

The second group of medications commonly prescribed for the treatment of lumbar strains is muscle relaxing medications. Again, there are several options that you may discuss with your doctor. These medications are often sedating, so they need to be used with care. For patients who have back spasm symptoms, these muscle relaxing mediations can be a very useful aspect of treatment.

Step 3: Physical Therapy/Exercises

Proper conditioning is important to both avoid this type of problem and recover from this injury. By stretching and strengthening the back muscles, you will help control the inflammation and better condition the lumbar back muscles. The exercises should not be painful. Without some simple exercises, the low back muscles can become “deconditioned,” or weak. When the low back muscles are “deconditioned”, it is very difficult to fully recover from low back injuries.

It is also important to understand that even if you are “in good shape,” you may have weak low back muscles. When you have a low back muscle injury, you should perform specific exercises that stretch and strengthen the muscles of the low back, hips and abdomen. These exercises are relatively simple, do not require special equipment, and can be performed at home.

Step 4: Further Evaluation

If your symptoms continue to persist despite treatment, it is appropriate to return to your doctor for further evaluation. Other causes of back pain should be considered, and perhaps x-rays or other studies (MRI, CT scan, bone scan, laboratory studies) may be needed to make an accurate diagnosis.

If you believe you are suffering from a back injury and need specialized orthopedic care, Orthopedic Specialists of Seattle has excellent treatment options available for you.